
WHITE PAPER: Basic Inspection Techniques
To Sample The Condition of Magnetic Tape
Versions of this inspection are included in:
International Standards ISO 18933-2006 and AES49-2005
International Standards ISO 18933-2006 and AES49-2005
To prevent damage during use and premature loss during storage, it is necessary to inspect magnetic tapes on a periodic basis. Basic warning signs of tape instability can often be identified using the following guidelines.
A minimum Seven-Step Physical Inspection is recommended.
While this examination does not identify all problems that can occur, if your tape fails any of these inspection criteria, it is endangered and needs attention. Attempts to play back such tapes before treatment place them, and your machinery, at risk.
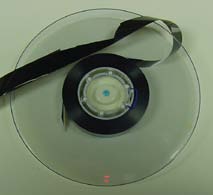
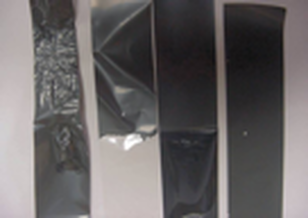
Ripped Beta-SP tape
|
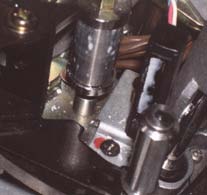
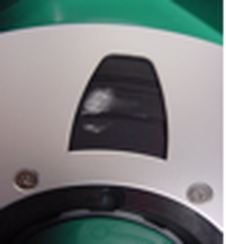
Contaminated 3/4" deck
|
Basic Inspection Techniques
To Sample The Condition of Magnetic Tape
The following inspection procedure should be performed in the order listed. If any sign of fungus is detected in step two, inspection should be stopped immediately:
1. Check physical container for damage that compromises the structural integrity of the container itself. Breakage is a strong indication of improper handling. If the container, reel or cassette is damaged, the tape inside is also likely to have suffered damage or contamination.
1. Check physical container for damage that compromises the structural integrity of the container itself. Breakage is a strong indication of improper handling. If the container, reel or cassette is damaged, the tape inside is also likely to have suffered damage or contamination.
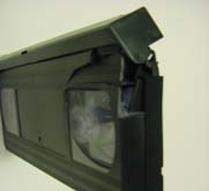
VHS with damaged shell
|
2” tape with bent reel
|
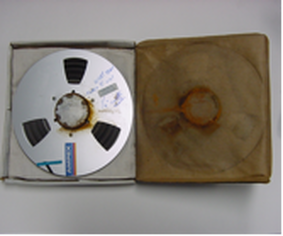
2. Check the interior of the container and the edges of the tape for patterned black, brown, or mustard colored contamination and for fuzzy or thread-like growths that indicate the presence of fungus. Fungus can grow on tape after it has been exposed to high humidity. Tapes with fungus should be isolated and treated by professionals as soon as possible. Tape with fungus can present a health hazard: if fungus is suspected do not continue inspection!
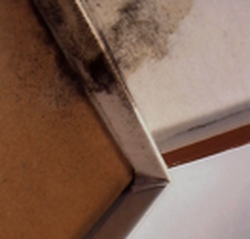
Fungus may start on box but
will soon spread to tape.
|
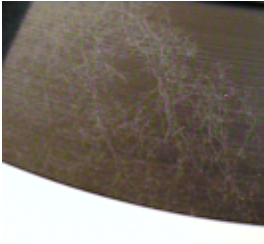
Typical "thread" patter of fungus on tape surface.
|
3. Smell the tape as soon as it is removed from its container. Hydrolytic breakdown of polyester binder creates esters that have distinctive odors but dissipate quickly. The most common odors can be characterized as "waxy," "dirty socks," or "astringent/pungent" depending on the binder. Some early tapes using an acetate base will also give off an odor of" vinegar" if the base is beginning to decay. Tapes with binder hydrolysis are in the process of self-destruction and can stick in the machine during playback, causing additional damage. Binder hydrolysis can be treated. Acetate breakdown is permanent.
|

Hydrolysis residue is not visible on tape until deposits collect on guides and heads.
|

4.Check the tape edge and the reel/cassette/cartridge for particulate contamination and for signs of staining that may indicate liquid contamination. Any visible contamination is an indication of poor storage or handling. Particulate contamination can block the signal during playback and can scratch both the tape and the playback heads. Liquid contamination will accelerate tape decay and can often result in tape wraps sticking together.
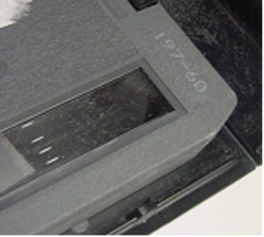
Debris on the outside of a cassette will indicate debris on the tape inside.
|
Cardboard containers offer no protection against water damage.
|
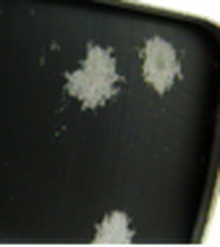
5. Check the tape edge for white powder or crystalline residue and check the interior of the container for black/brown flakes of oxide. These symptoms, caused by a variety of conditions, indicate that the tape is beginning to break down.
|
|
|
|
Powdery or crystalline residues indicate breakdown of various chemical components.
|
Black/brown flakes indicate the recording layer is falling off.
|
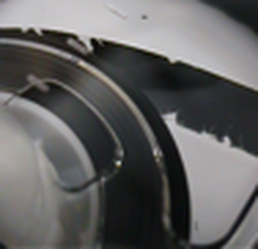
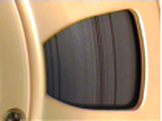
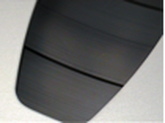
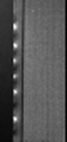
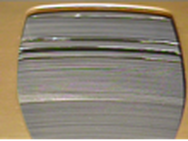
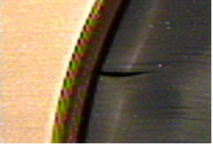
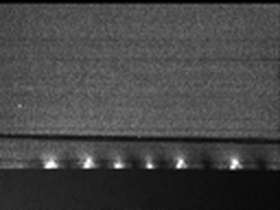
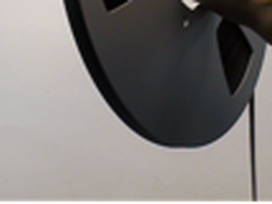
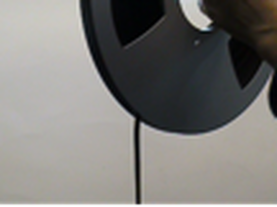
6. With light source above and slightly behind, tilt tape edge-on at approximately 45° away from the light source and inspect tape pack. Check for spoking, rippling, popped strands, stepped pack, flange pack, edge damage, "shiners" and windows. These terms refer to irregularities in the way the tape is wound onto the hub and are indications of improper handling, storage or a badly set up machine. Spoking shows up as a pattern radiating out from the hub and is the result of improper tension. Rippling is a wavy pattern in the tape pack and is caused by exposure to extreme environmental variations. Popped strands and stepped pack refer to individual or groups of tape wraps that stick up from the edge of the pack. When you shine the light on the tape, "shiners" show up as thin strips of greater reflection resulting from the edge of the tape being torn or folded. Windows are gaps in the tape pack caused by the tape becoming loose on the hub and often indicate a place where the tape has folded back over on itself or has cinched.
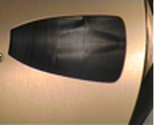
Spoking
|
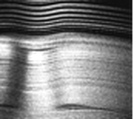
Rippling
|
Popped strands
|
Stepped pack
|

|
Flange pack
|
Edge damage/ "shiners"
|
Windows/gaps
|

Cinched/"pleated"
|
7. If the tape is reel to reel, allow a few outer wraps to hang loose and examine for physical distortion and binder/base adhesion failure. Physical distortion caused by improper tension will often show up on a loose piece of tape as wavy or "scalloped" edges. Binder/base failure is identified by sections of the tape that appear a different color where the binder has come off. Note: If transparent or masking tape has been used to secure the tape end, binder loss in the isolated area under the adhesive is not an indication of binder/base failure.
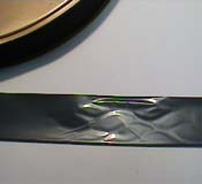
Wavy or scalloped edge
|
Binder/base adhesion failure
|
With a few wraps hanging loose, turn the reel slowly to determine if the tape falls free or sticks to the pack. Inter-wrap adhesion can be a sign of binder hydrolysis.
Tape should fall free
|
Not stick to pack
|
Note: If the tape is a cassette, examination for deformation and some decay residue requires that the “access door” on the front of the cassette be held open to view the tape. Care must be taken during this procedure, as it is easy to damage the tape when closing the access door after the examination.